Everything You need to Know Before Installing peel and Stick Wallpaper
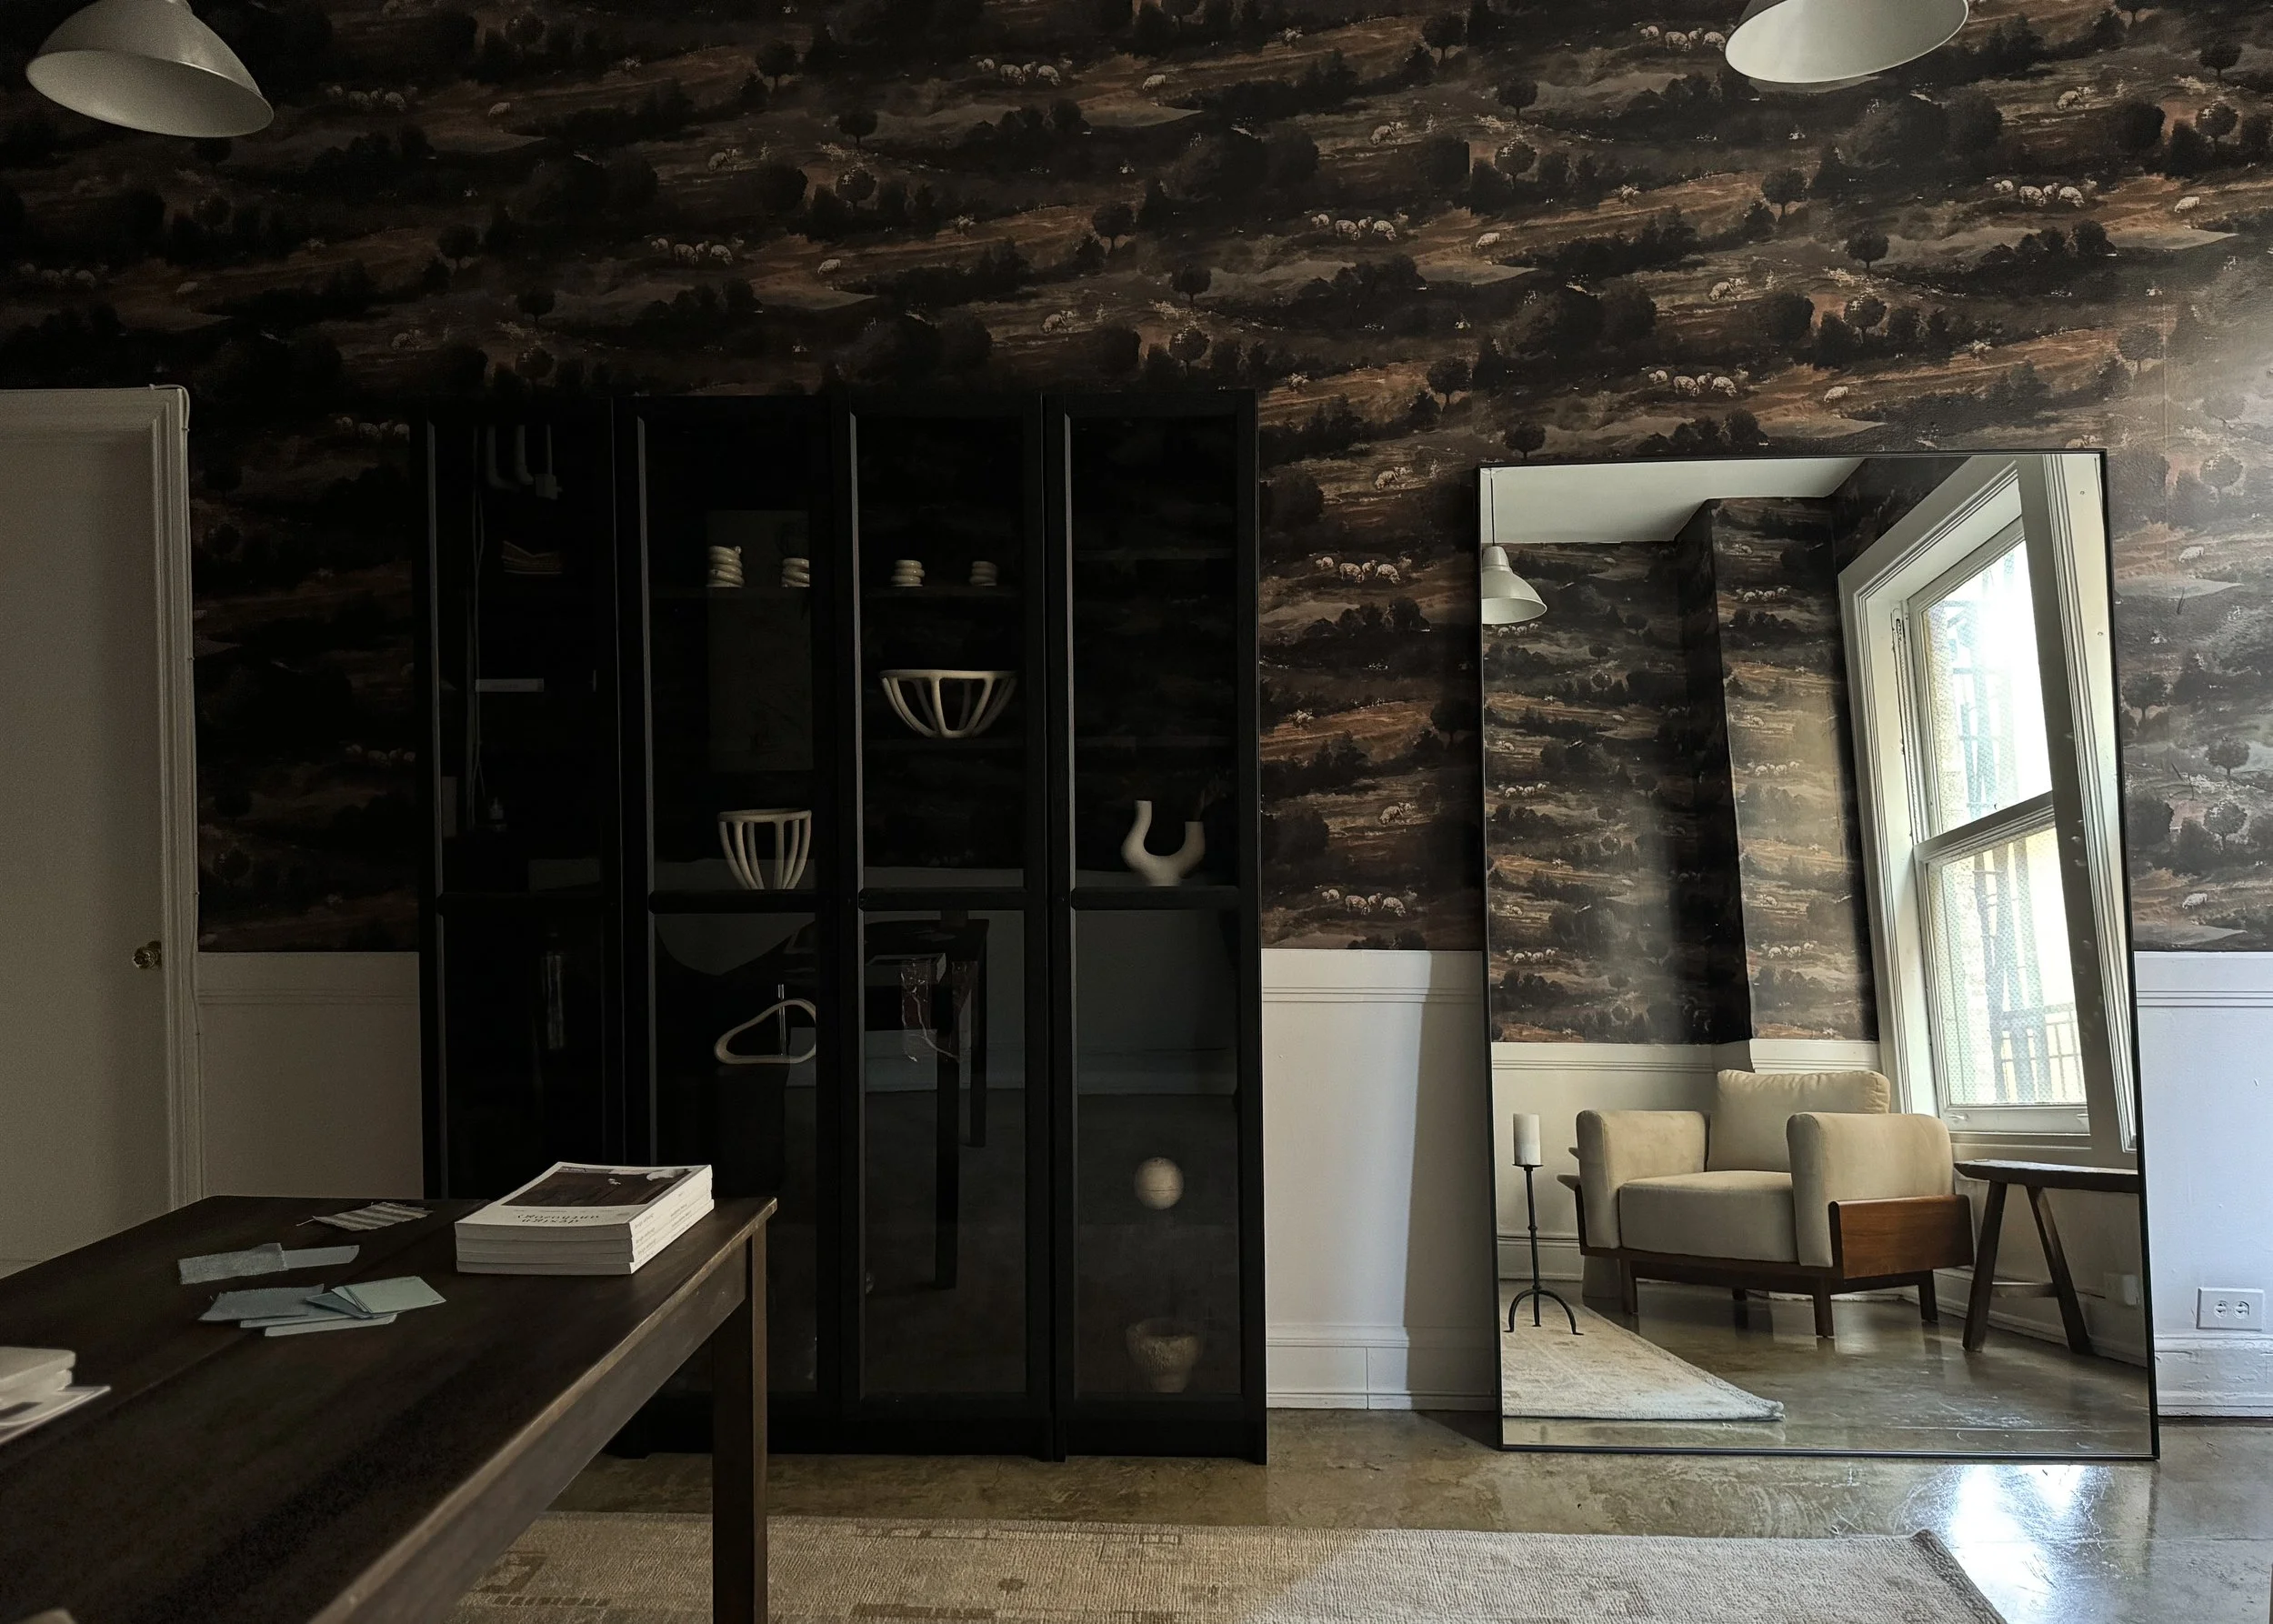
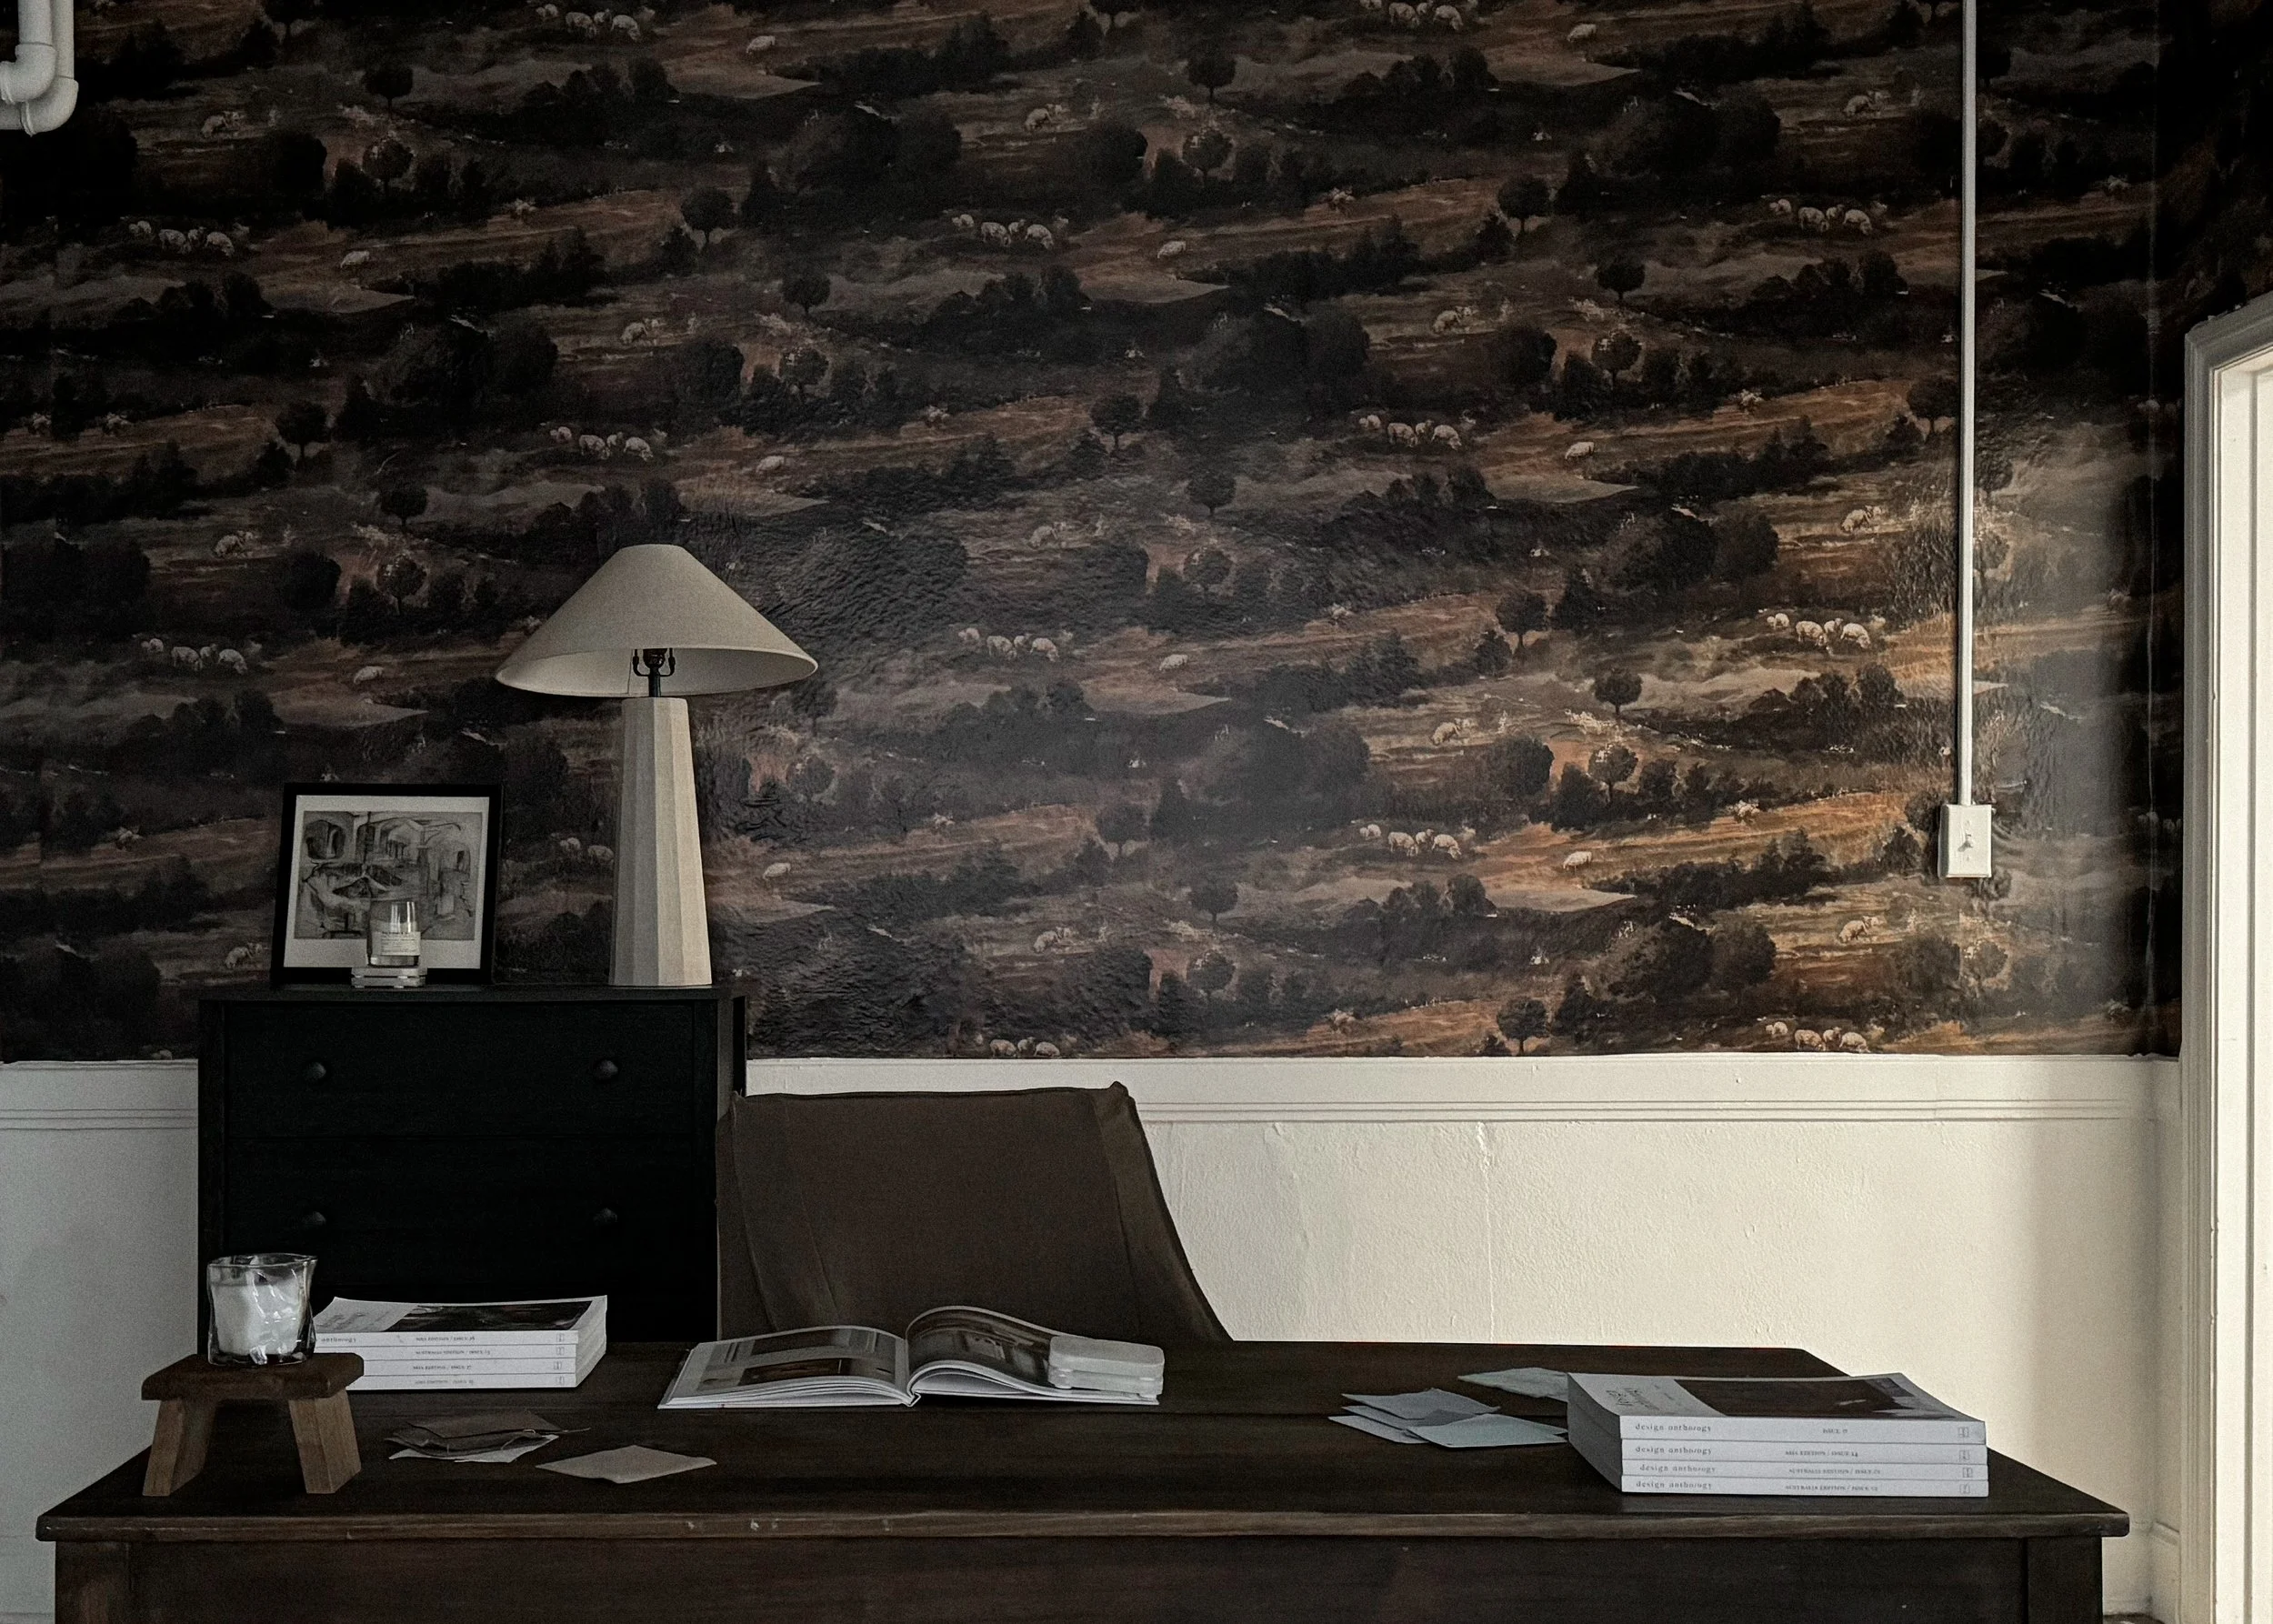
Tempaper Peel & Stick Wallpaper featured in Ajai’s office.
Exciting news! It’s alway been one of my dreams to have a corner office downtown and I am beyond thrilled to share that dream has finally come true. I found a 2,500 square foot space that can act as my showroom / studio, for shooting all of my fun brand projects, in an addition to a separate room for meeting with my interior design clients.
Immediately, I imagined cozying up my office space and thought “what’s one of the coziest things you can do in a space? Add wallpaper of course!
I found myself drawn to a wallpaper called “Next Summer” by Tempaper & Co. It’s the perfect way to feel like I’m escaping to the European countryside. This wallpaper was designed by interior designer Jeremiah Brent “and inspired by his family getaways to Portugal.

BEFORE photo of Ajai’s office.
GETTING STARTED
“Tempaper is recommended for smooth surfaces that are in good condition and have been primed and painted with a satin or semi-gloss finish.
If your surface is freshly painted, they ask that you allow your surface to fully cure before applying removable wallpaper to it. Follow the directions on your paint can as each paint type has different curing times.
They also recommend wiping your surface with a 1:1 Isopropyl alcohol and water solution and letting it dry before installation to ensure best compatibility. This may help with adhesion and will clean any dust or debris off your surface.
For an easier install, remove switch plates and outlet covers prior to installation. Be sure to turn the electrical supply off prior to removing the switch and outlet covers and only restoring power once these covers are fully replaced.”
SURFACES NOT RECOMMENDED
Matte, flat, and low sheen paints
Textured surfaces
Exterior surfaces
Lush rolling fields, scenes of sheep, and a calming palette of deep greens and browns will bring a serene, nature-inspired look to any room in your home.” Even better, this wallpaper comes in the form of a peel and stick. I want to get a feel for what it’s like to have my own office space, and will be opting for temporary design options to begin with. This makes a peel and stick option perfect. That brings me to my next topic: How to have a smooth process when installing a peel and stick wallpaper.
I’ve installed my share of peel and stick wallpapers, but this is by far the largest area I’ve ever covered. I learned so much during this project, and thought it would be lovely to share these steps and tips with anyone who needs a few tips before getting started. With that said, here’s everything you need to know before installing a peel and stick wallpaper!

AFTER photo of Ajai’s office with wallpaper installation.
If you are interested in testing out your textured surface, be sure to read Tempaper’s blog post here first. This will assist additionally in getting you ready for your project.
Tempaper also has suggested tools to utilize during your DIY peel and stick project.
TOOLS
Level
Pencil
Step stool
Tape measure
PROJECT LEVEL OF DIFFICULTY
Medium

The Tempaper tool bundle can be found here.
Wallpaper Application - Precutting Your Panels
Measure the height and width of your surface, this will determine how many panels you will need.
Pre-cut your first panel to the height of your surface adding 2-3 inches of excess material at the bottom.
Be sure to align pattern with each consecutive panel prior to cutting, numbering the back of each panel as you work.
Using a level, mark a plumb line* or vertical guide the length of surface.
Peel back 3-4 ft. of the backing.
Begin at the top edge aligning paper with your vertical guide to ensure a straight application.
Use a squeegee to smooth paper to surface working from the center out. Tempaper can be repositioned as needed to ensure pattern alignment and to eliminate bubbling.
Continue in 3-4 foot increments peeling and smoothing until you reach the bottom edge of your surface.
Repeat steps 5-8 until the surface has been fully covered.
Trim where needed with a craft knife to complete your application.
Wallpaper Application - Working From the Roll
Using a level, mark a plumb line* or vertical guide down the length of surface.
Place your roll on a soft surface, such as a bath mat or towel, at the bottom edge of starting point.
Pull paper up from roll to meet the top edge of surface.
Peel back 3-4 ft. of the backing.
Begin at the top edge aligning paper with your vertical guide to ensure a straight application.

6. Use a squeegee to smooth paper to surface working from the center out. Tempaper can be repositioned as needed to ensure pattern alignment and to eliminate bubbling.
7. Continue in 3-4 foot increments peeling and smoothing until you reach the bottom edge of your surface allowing paper to overhang by 2-3 inches and cut paper from roll.
8. Repeat steps 2-7 making sure to align pattern with each consecutive panel until the surface has been fully covered.
9. Trim where needed with a craft knife to complete your application.
If you find the weight of the roll or the backing paper bothersome during application, please read the above 'Precutting your Panels' wallpaper application.
*How to Draw a Plumb Line
In order to ensure that your wallpaper is hung straight, we recommend marking a vertical plumb line on your wall.
Starting at the corner of your wall, measure out from the corner the width of the roll minus .5 inches. For example, for rolls of 20.5 wide you would mark 20 inches from the corner. For rolls 27 inches wide, you would mark 26.5 inches from the corner.
Place your level at the mark and drawn a straight, vertical line (also known as a plumb line).
We recommend that you mark a plumb line every time you arrive at a corner or start a new wall.
Helpful Hints for Applying All Peel & Stick Wallpaper
Grab a friend. While it's easy to apply our wallpaper by yourself, it's more fun to tackle a DIY beginner-level project with a friend.
Be careful not to pull on the paper during the application or else the paper may stretch and won't align properly.
If air bubbles occur, you can use a safety pin to create a tiny hole in the center of the bubble to release the air.